Jewel Legend Quest: Master the Ancient Gems
Match three and the gems vanish. Match four or five and the board hands you a tool instead, and from that point the game stops being about spotting colours and starts being about deciding what to build. This jewel legend quest android walkthrough is about the second half of that sentence: what each special piece actually does, and which of them are worth giving up a turn to arrange.
What this desk covers
Four subjects, each here because it changes how a board plays rather than because it fills a page.
-
The creation tableSection 3
Which match shape produces which piece. Most players learn two of the five by accident and never find the rest, because nothing in the game tells you.
-
Pairings worth a turnSection 3
Two specials detonated together behave differently from either alone. Some combinations justify spending a move to set up; most do not.
-
Obstacle behaviourSection 4
Locked tiles, ice and chained pieces each fail differently. Knowing which needs a special and which comes apart under ordinary matches saves more moves than any single clever swap.
-
Long-term board readingSection 4
Planning two moves ahead on a falling board is mostly a question of which columns are about to move. That is learnable, and it is what separates a stalled player from one who is progressing.
How a page here gets written
A short account of the process, because a site giving advice should say where the advice came from.
- The subject has to recur. Something earns a section when it holds across many boards. How a rainbow piece behaves qualifies; the layout of stage 213 does not, and would be wrong after the next update anyway.
- It gets played, not summarised. Everything written about board behaviour here comes from playing boards of that kind. Where a claim could not be checked that way, it is either pointed at the store listing or cut.
- Unverifiable numbers come out. Star ratings, install counts, tier lists and claims about how many titles were tested are all removed. A reader cannot confirm any of them, and they age badly on a static page.
- App-specific facts point at the listing. Version requirements, size, price and ad model belong to the developer and change without notice. They are named here as practical indications, with the store page as the current source.
- Every page carries a review date. It says when the text was last read through. It is a claim about the writing, not a guarantee about the game.
Which match makes which gem
The game never explains this, and it is the single most useful table to have in your head. The last column is the one that matters in practice: a special piece sitting on the board doing nothing is a wasted move, and the partner is usually worth arranging.
| Match made | Piece created | What it does alone | Best partner |
|---|---|---|---|
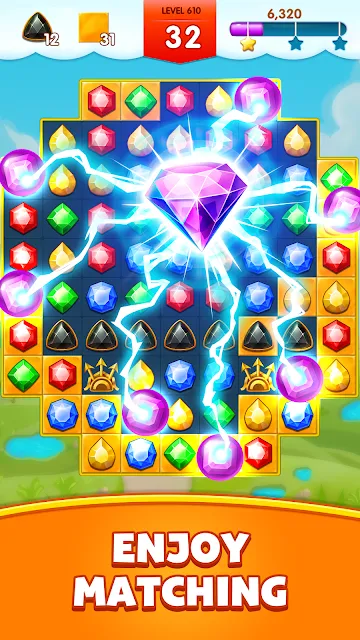
| Four in a row | Line gem | Clears the row or column it is aligned with | A second line gem, for a full cross |
| Five in an L or T | Bomb gem | Removes a block of cells around itself | A line gem, for three rows and three columns |
| Five in a straight line | Colour crystal | Removes every gem of one chosen colour | A line gem, turning that colour into rockets |
| Six or more at once | Line gem plus a cascade | One piece, then whatever the refill produces | Nothing; take it immediately |
| Hammer, from the tool bar | Not a match | Removes one chosen obstacle tile | Used alone, and it costs no turn |
Behaviour common to this board format. Individual games rename these pieces and occasionally change a radius; the in-game help screen is authoritative for any particular title.
Two notes that do not fit in a table. First, a colour crystal is worth far more late than early: used on move two it removes whatever colour happens to be numerous, while used on move eighteen it removes the colour your objective still needs. Second, the hammer is the only tool that costs nothing, which makes it the correct answer to a single stubborn tile and the wrong answer to anything else.
Obstacles, and the order to take them in
Locked tiles
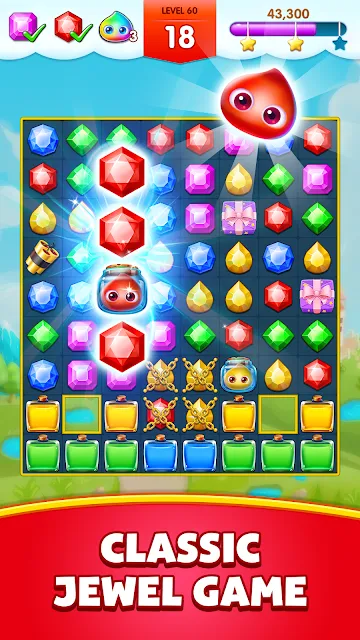
A gem inside a lock still matches, but the lock absorbs the first clear and the gem stays. That means every locked tile costs one extra match, and a cluster of six locks quietly doubles the length of the stage. Break them early, while a wasted move is affordable.
Ice
Ice sits over the cell rather than the gem, and it usually comes in two layers on later boards. Ordinary matches chip it, which makes it the cheapest obstacle to deal with and the one least worth spending a special on.
Chains
Chained gems cannot be swapped at all, only cleared by a match that includes them, which is a real constraint because you cannot arrange that match deliberately. Chains are the one obstacle where a bomb or a line gem genuinely earns its turn.
Planning around all three
The order that works is: chains first because they block movement, then locks because they double every clear, then ice last because it falls to ordinary play. Doing it in the reverse order is the most common way to arrive at the last five moves with the board still half covered.
What you will not find here
It is easier to state the omissions than to hope they are noticed.
No scores out of ten. A single number hides the only interesting information — that a game runs beautifully on a new handset and badly on a four-year-old one, or that it is fine offline and thin online.
No invented credentials. Nobody here has tested five hundred titles, holds a certification or runs a team. One person in Montréal writes it, and that is said on every page.
No tracking. There is no analytics on this domain, no advertising network, no third-party script; every file the browser loads is served from tulqemari.com.
No affiliate arrangement. Nothing here is sponsored and no link pays. The single paid item is the printed card described below, written by the same person who writes the pages.
The table, on paper
The site is free and stays free. What it cannot be is a card beside the phone while a board is open, which is the whole reason this exists.
The Gem Creation Card
Ten pages, folded to sit next to a handset. It goes further than the table above, because a page has room for five rows and a booklet has room for the rest.
- Every match shape drawn, with the piece it produces and the two shapes that look similar but produce nothing.
- The full pairing matrix, including the combinations that are worse than using either piece alone.
- An obstacle order page: chains, locks, ice, and the cost of doing them in the wrong sequence.
- A colour-crystal timing page, which is the single decision that most often decides a hard stage.
- Two blank grids for sketching a board you keep failing.
Order it by email Terms of the order
One item sold by a private individual, not a storefront. This domain has no checkout, no payment page and collects no card details anywhere: you write, Emma Lemieux answers with transfer details, and the file follows once the transfer arrives. No sales tax is added and no invoice from a registered business is issued. If it does not arrive, or arrives and will not open, say so and the money goes back in full.
One listing worth opening
Everything above is read off a board rather than a store page, but app-specific facts are not, so here is a listing with its labels exactly as the store shows them. Nothing is downloaded from this site.
Jewels Legend — Match 3 Puzzle, by LinkDesks
Open the listing on Google Play
Price, taxes and any fees are shown on Google Play at the next step. Listings change without notice; the date above records only when these labels were last read.
Write to us
[email protected]Email is the only channel here. No forms, no newsletter and no data collection anywhere on this site — you write, and the answer goes back to the address you used.